
Introduction
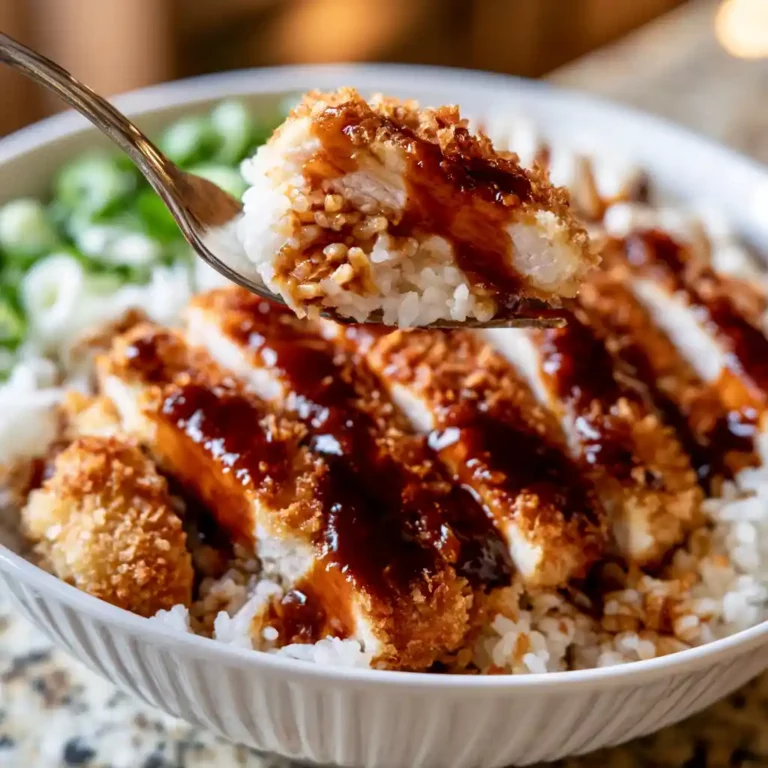
I make this Japanese Katsu Bowl when I want something crispy, saucy, and genuinely satisfying that comes together faster than takeout. Crispy panko-breaded chicken cutlets sliced over steamed rice, drizzled with sweet and savory tonkatsu sauce, and topped with shredded cabbage and green onions.
What makes this chicken katsu bowl recipe so good is the contrast of textures. The chicken stays incredibly crispy against the soft rice and the tangy tonkatsu sauce brings everything together in that classic Japanese comfort food way.
This has become one of my most-made weeknight dinners because it’s straightforward, deeply satisfying, and the whole family always goes back for seconds.
Why You’ll Love This Recipe
This Japanese Katsu Bowl delivers that crispy, saucy, restaurant-quality flavor at home in about 30 minutes.
The panko breadcrumb coating gives the chicken an exceptionally light and crunchy crust that holds up really well even after the tonkatsu sauce is drizzled on top.
This chicken katsu bowl recipe works for the whole family. The flavors are approachable and familiar enough for kids while still tasting authentically Japanese.
It’s easy to customize with different proteins — pork cutlets are equally classic, and tofu works great for a vegetarian version.
Leftovers reheat well too, making this one of the best meal prep dinners in a regular rotation.
Advertisements
About the Ingredients
Chicken Breast or Thigh
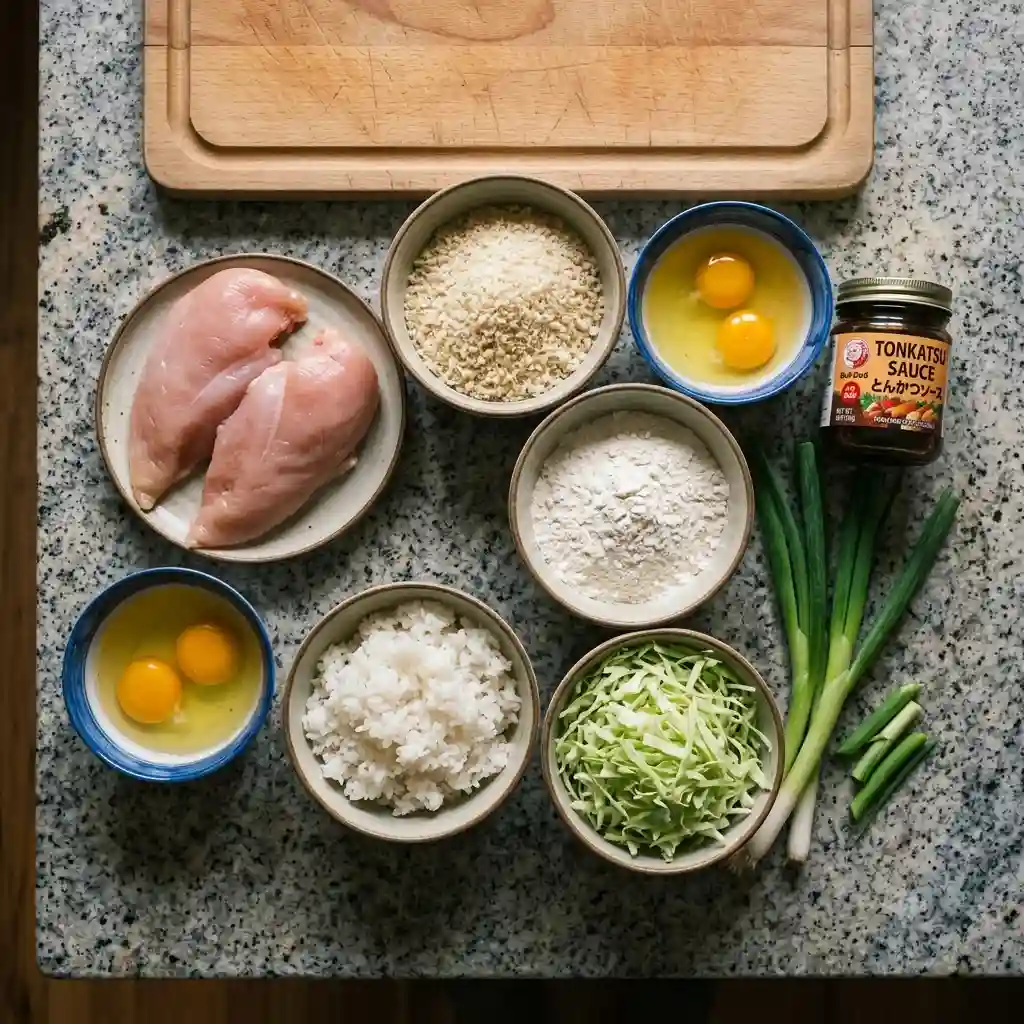
Boneless chicken breasts pounded thin make the most classic Japanese Katsu Bowl. Thin cutlets cook faster and get crispier throughout. Chicken thighs work too and stay juicier. Pound to about ½ inch thick for the best result.
Panko Breadcrumbs
Panko is non-negotiable in this chicken katsu bowl recipe. Japanese-style panko breadcrumbs are coarser and lighter than regular breadcrumbs, which is what gives katsu its signature extra-crispy, shatteringly light crust. Don’t substitute with regular breadcrumbs.
Advertisements
Tonkatsu Sauce
A bottled tonkatsu sauce is the classic accompaniment to any Japanese Katsu Bowl. It’s thick, tangy, and slightly sweet — similar to a Worcestershire-based barbecue sauce. Bull-Dog brand is widely available and authentic. You can also make a quick version with Worcestershire sauce, ketchup, soy sauce, and a little sugar.
Steamed Japanese Rice
Short-grain white rice is the traditional base for this easy katsu donburi. It’s slightly sticky, which helps hold the bowl together as you eat. Medium-grain rice works as a substitute if short-grain isn’t available.
Advertisements
Shredded Cabbage
Finely shredded green cabbage adds a fresh, slightly crunchy contrast to the crispy katsu. This is served both in the bowl and traditionally alongside katsu in Japanese cuisine.
Eggs and Flour
The classic three-step breading process — flour, egg, panko — is what gives the chicken its crispy coating. Don’t skip any step. The flour helps the egg stick, and the egg helps the panko adhere to form that perfect crust.
Advertisements
Tips and Tricks
Pound the chicken to an even ½ inch thickness before breading. Uneven thickness means some parts overcook before others are done.
Press the panko firmly onto the chicken after dipping in egg. A light press ensures the coating adheres properly and doesn’t fall off during frying.
Use neutral oil with a high smoke point like vegetable or canola oil. The oil should be at 350°F before adding the chicken for the crispiest result.
Let the fried chicken rest for 2 minutes before slicing so the juices redistribute and the crust stays on cleanly.
Pro Tips
Double dip the chicken — flour, egg, panko, then egg and panko again — for an extra thick, crunchy crust in this Japanese Katsu Bowl.
Rest the breaded chicken on a wire rack for 5 minutes before frying. This helps the coating adhere and dry slightly, which results in a crispier crust.
Slice the katsu at a slight angle for a cleaner presentation and more surface area for the tonkatsu sauce to coat in this chicken katsu bowl recipe.
Serve with Japanese mayo (Kewpie) alongside the tonkatsu sauce for an extra creamy, rich finishing drizzle.
Step-by-Step Instructions
- Cook 2 cups of short-grain white rice according to package directions. Keep warm.
- Pound 2 chicken breasts to about ½ inch thickness. Season both sides with salt and pepper.
- Set up a breading station: one shallow bowl with ½ cup of all-purpose flour, one with 2 beaten eggs, and one with 1½ cups of panko breadcrumbs.
- Dredge each chicken breast in flour, shaking off excess. Dip in egg, then press firmly into the panko on both sides.
- Heat 1 inch of neutral oil in a heavy skillet over medium-high heat to about 350°F.
- Fry the chicken for 3 to 4 minutes per side until deeply golden and cooked through.
- Transfer to a wire rack or paper towel-lined plate. Let rest for 2 minutes, then slice at an angle.
- Divide the rice between bowls. Top with shredded cabbage and sliced katsu.
- Drizzle generously with tonkatsu sauce and top with sliced green onions.
- Serve immediately with extra tonkatsu sauce and Kewpie mayo on the side.
Variations
Pork katsu version: Swap the chicken for thin pork loin cutlets for a classic tonkatsu bowl, which is arguably the most traditional version of this Japanese Katsu Bowl.
Tofu katsu version: Use firm tofu pressed and dried, breaded and fried the same way as the chicken for a vegetarian take on this easy katsu donburi.
Spicy version: Mix sriracha or Japanese chili paste into the tonkatsu sauce for a spicy version that adds heat to every bite.
Katsu curry version: Replace the tonkatsu sauce with Japanese curry sauce for a katsu curry bowl that’s equally comforting and delicious.
Air fryer version: Bread the chicken the same way and air fry at 400°F for 12 to 14 minutes, flipping halfway. Less oil but still very good crust.
How to Store
Store the components of this Japanese Katsu Bowl separately for best results. The fried chicken keeps in the refrigerator for up to 3 days in an airtight container.
Reheat the chicken in a 375°F oven for 8 to 10 minutes or in an air fryer at 375°F for 5 minutes to bring back the crispy crust. Avoid microwaving since it makes the crust soggy.
This dish doesn’t freeze particularly well once assembled. For meal prep, store the rice, chicken, and sauce separately and assemble fresh bowls each time.
Frequently Asked Questions
Can I use chicken thighs instead of breast for this Japanese Katsu Bowl?
Yes. Boneless skinless chicken thighs stay juicier and are actually preferred by many people over breast for katsu. Pound them to an even thickness before breading.
What is tonkatsu sauce?
Tonkatsu sauce is a thick, tangy Japanese condiment similar to Worcestershire sauce combined with a fruity barbecue flavor. It’s available at most Asian grocery stores or online. Bull-Dog is the most popular brand for this chicken katsu bowl recipe.
Can I make tonkatsu sauce from scratch?
Yes. Mix 3 tablespoons of Worcestershire sauce, 2 tablespoons of ketchup, 1 tablespoon of soy sauce, 1 teaspoon of sugar, and 1 teaspoon of Dijon mustard. It’s a very close approximation to the bottled version.
Why is my panko coating falling off?
Usually this means the breading wasn’t pressed firmly enough or the oil wasn’t hot enough when the chicken was added. Press the panko firmly and check the oil temperature before frying.
Can I make this easy katsu donburi in an air fryer?
Yes. Air fry at 400°F for 12 to 14 minutes, flipping halfway. Spray with cooking oil before air frying. The crust won’t be quite as shattery as pan-fried but it’s still very good.
What rice is best for a Japanese Katsu Bowl?
Short-grain Japanese white rice is traditional and gives the best texture. It’s slightly sticky and holds the bowl together well. Medium-grain rice works as a substitute.
How do I keep the katsu crispy after slicing?
Let it rest on a wire rack rather than a plate. Wire racks allow air circulation that prevents steam from building up under the crust and making it soggy.
Can I use regular breadcrumbs instead of panko?
Panko is strongly recommended for the authentic crust of this Japanese Katsu Bowl. Regular breadcrumbs give a denser, less crispy result that lacks the signature katsu texture.
Japanese Katsu Bowl
Equipment
- Heavy skillet or Dutch oven
- wire rack
- Three shallow bowls for breading
- Rice cooker or pot
- Meat mallet
Ingredients
Ingredients
- 2 boneless chicken breasts, pounded thin about ½ inch thick
- 0.5 cup all-purpose flour for breading
- 2 large eggs, beaten for breading
- 1.5 cups panko breadcrumbs
- 1 cup neutral oil for frying
- 2 cups short-grain white rice cooked
- 1 cup green cabbage, finely shredded
- 0.5 cup tonkatsu sauce plus extra for serving
- 2 stalks green onions, thinly sliced for garnish
- Kewpie mayo optional, for drizzling
- salt and black pepper to taste
Instructions
- Cook the short-grain white rice according to package directions. Keep warm.
- Pound the chicken breasts to about ½ inch thickness. Season both sides with salt and pepper.
- Set up a breading station with three shallow bowls: flour, beaten eggs, and panko breadcrumbs.
- Dredge each chicken breast in flour, shaking off excess. Dip in egg, then press firmly into the panko on both sides.
- Heat 1 inch of neutral oil in a heavy skillet over medium-high heat to about 350°F.
- Fry the chicken for 3 to 4 minutes per side until deeply golden and cooked through.
- Transfer to a wire rack and let rest for 2 minutes, then slice at an angle.
- Divide the rice between bowls. Top with shredded cabbage and sliced katsu.
- Drizzle generously with tonkatsu sauce and top with sliced green onions.
- Serve immediately with extra tonkatsu sauce and Kewpie mayo on the side if desired.
Notes
Advertisements